|
  

Wing Tips
Running Total Hours:
0.0
 | 2009.01.24:
(0.0) I've been
working on the canopy for weeks and weeks and needed a break. So
I took a detour for a couple of days and fitted the flush light lenses to the wing tips. These
lenses come from Van's as a single molding of acrylic that has to be
cut in two, and
then each half trimmed to fit its respective wing tip. Similar process to
fitting the
canopy, but much easier due to the smaller size and simpler
geometry.
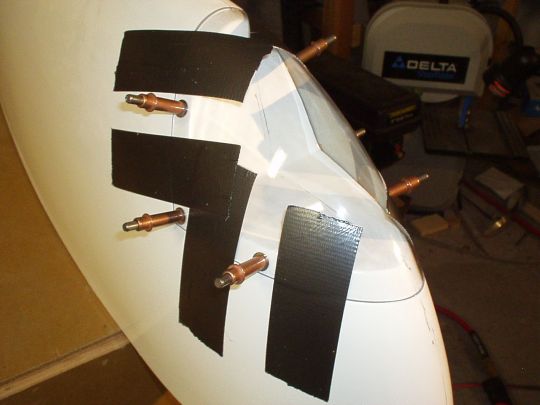
After trimming, I match-drilled the lenses and wingtips. I've
seen many RV's with only a screw in each corner (i.e. two screws per
lens), but that felt a little flimsy. I went with six screws per
lens: the corners, plus one 3" forward of the corner and one
3" outboard of the corner, top and bottom. That feels
pretty secure. I then enlarged the holes and countersunk the
lenses to accept flush 6-32 screws and tinnerman washers.
Following the advice of several RV builders, I used an abrasive
"PermaGrit" countersink bit. This worked ok, but left
a pretty rough countersink surface. The imperfections are
concentric of course, not radial, so there shouldn't be a tendency to
crack. But still, a clean countersink would be better. Not
worried about it here, but I plan to look into alternative methods of
countersinking plexi for the canopy.
Rather than just riveting nutplates to the fiberglass wing tips, I
decided to make a thin aluminum "L"-shaped backing strip or
each set of 3 nut plates (i.e. one for top, one for bottom).
This will later be epoxied and/or riveted into the wingtip, which will
be much more secure. |
| 2009.03.07:
(0.0) Again,
taking a quick break from the canopy, and trying out a process in
miniature on the wing tips before doing it on the canopy. This
time: composite work. I bonded the nut plate backing strips into
the wing tips. The process I used is as follows: First I drilled
a bunch of 1/16" holes in the backing plates to give the adhesive
more to grab onto. I then prepped the bonding surfaces (the wing
tips and the backing plates) by cleaning with acetone, abrading with
150-grit aluminum oxide sand paper, and again a wipe with
acetone. Mixed up some epoxy (West Systems 105 resin & 206
hardener) and wetted the mating surfaces with "neat"
epoxy. I then took the remaining epoxy and mixed in flox to a
consistency somewhere between mayonnaise and peanut butter. I
needed it thickened because the inside of the wing tip has a fairly
uneven surface, so the gaps between it and the nut plate backing
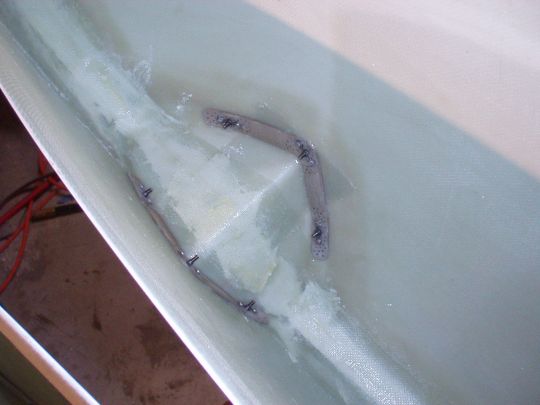
strips needed to be adequately filled. I spread a generous
amount of the flox mix on the wingtip surface, and installed the nut
plate backing strips. I secured the nut plate backing strips
simply by putting in the screws, which I first coated with wax to
prevent them from bonding. Tightening things down made the flox
ooze through all the 1/16" holes and around the edges of the
backing strips, which is exactly what I wanted. I then used some
popsicle sticks to remove the excess and form nice filltes around the
edges. I also coated the inside (i.e. non-bonding) surface of
the backing strips with a thin layer of the flox mix to basically
encapsulate it, strengthening its retention and sealing it against
corrosion.
 |
| 2010.02.25:
(0.0) Now that
the wing skins are fully riveted, I'm starting to fit the fiberglass
wing tips to the wings. The initial fit is pretty bad. The
contour of the leading edge doesn't match the wing. The length
(chord) of the tips is about 1/4" longer than the wings.
The aft 1/3 of the tips are substantially bowed. And the tips
have some twist to them, apparently due to simalignment when the tip
halves were bonded together at the factory. Another example of
poor quality composite parts from Van's. Argh... It'll
take a lot of surgery to get a good fit. |
|
|
